
Turning the feature on
1. Log in to https://pearldiver.blackpearl.com/
2. Navigate to Settings > Account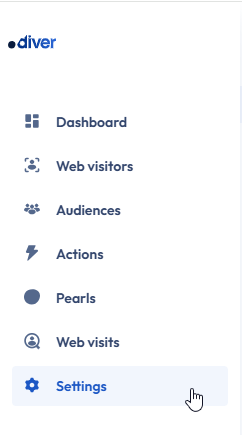
3. Enable Actions Audience Branding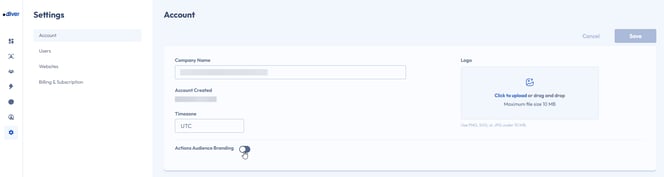
4. Update the Name and Prefix fields

5. Click Save on the top right
The below outlines the actions that will take effect during the next system sync.
| Action | Effects | Changes |
| Active Campaign | Tags | New Tag with custom Source |
| GoHighLevel | Tags | New Tag with custom Prefix |
| Source Fields | Rename Source field | |
| MailChimp | 1-1 tags | New tag with custom Prefix |
| Many-1tags | New tag with custom Source | |
| Salesforce | Lead Source Field | Rename Source Field |
Below is a table of the actions that immediately take effect.
| Action | Effects | Changes |
| Constant Contact | Lists | Renames the List |
| Google Ads | 1-1 and Default Lists | Renames the List |
| Klaviyo |
Lists |
Renames the List |
|
MailChimp |
Audience | Renames the Audience |
| Meta | 1-1 and Default Lists | Renames the List |
| MIcrosoft Ads | 1-1 and Default Lists | Renames the List |
| Tiktok | 1-1 and Default Lists | Renames the List |